Settings to Check Reading of Barcodes CL4-SXR
By using the barcode check function, you can use the scanner mounted to the product to read and verify the of printed barcodes to prevent the distribution of labels with invalid barcodes.

- Cannot be used in Tear-Off mode.
- Cannot be used with RFID models.
- Use the barcode checker mount kit to mount the scanner.
- Please disable the sleep mode when using the barcode checker (excluding USB connections).
Before connecting the scanner to the product, change its operating settings to enable communication with the product.
To use the barcode check function, install a compatible scanner and then configure settings using the following procedure.
If using a scanner not manufactured by Keyence, proceed to step 4.
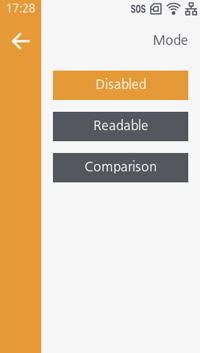
- From the settings screen, tap [Printing] > [Advanced] > [Barcode Checker] > [Mode] to select the barcode check function mode.
-
[Disabled]
Disable the barcode check. -
[Readable]
When [Readable] is selected, it checks whether the printed barcodes are readable. Determines whether the number of barcodes read by the scanner matches the number of barcodes in the print data.
If the number of barcodes read by the scanner reaches the number of barcodes in the print data, then they are judged to be readable.
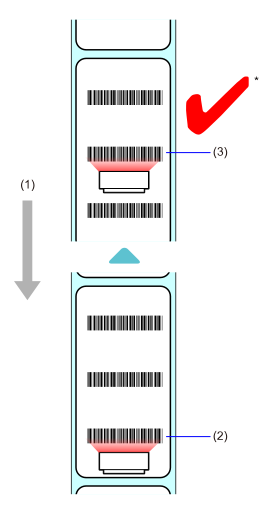
- They are considered readable even if the number of barcodes read by the scanner exceeds the number of barcodes in the print data.
- Media feed direction
- First barcode
- Second barcode
- Barcodes created using methods other than barcode commands may not be read by the scanner, causing the Readable mode to function incorrectly.
-
[Comparison]
When [Comparison] is selected, it checks whether the barcode reading results match the barcode data in the print data. Applies to barcodes created with the barcode command.
If the result of reading a printed barcode matches the barcode data in the print data, it is judged to be normal.
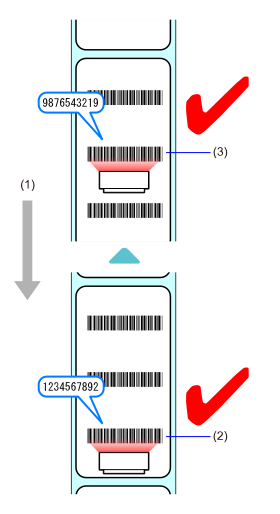
Initial value: Disabled- Media feed direction
- First barcode
- Second barcode

- To use Comparison mode, barcodes must be created using the barcode command. If graphic data (such as BMP images) or pre-printed barcodes are within the reading range, Comparison mode will not function properly.
- When the Readable mode or Comparison mode is set, a barcode reader connection error occurs if the barcode checker is not connected at product startup or at the start of printing.
- Even if Readable mode or Comparison mode is set, barcode verification is not performed if no barcode data is specified in the print data.
- Multiple barcodes on one label can also be checked. There is no limit to the number of barcodes, but a reading error will occur if a single barcode exceeds 100 bytes or the total barcode data exceeds 200 kilobytes.
-
[Disabled]
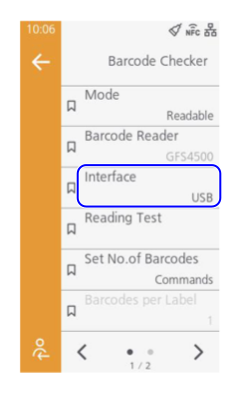
- Set [Interface] to [RS-232C].
- Power off the product and then power it back on.
When you power on the product, the scanner will also turn on automatically.
- When the scanner powers on, a laser beam is emitted from the scanner. Take great care to avoid direct eye contact with the laser beam.
- Depending on the scanner model, it may continue to emit a laser light while the product is powered on. To turn off the laser light, power off the product.
When the connection to the scanner is complete,
- Do not plug or unplug the scanner while the product is powered on. This product may not operate correctly.
 is shown in the status bar.
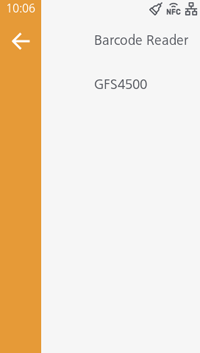
- From the settings screen, tap [Printing] > [Advanced] > [Barcode Checker] and confirm that the connected scanner is shown in [Barcode Reader].
- Place a label with a printed barcode within the scanner's reading range.
- Tap [Reading Test] to perform a barcode reading test.
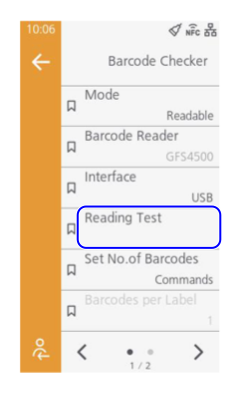
If the reading is successful, the type of barcode read and its data will be displayed on the screen.
If reading fails, or if the displayed reading result is incorrect, adjust the position of the scanner. - If necessary, configure the following advanced settings.
[Set No.of Barcodes]
[Barcodes per Label]
When [Settings] in [Set No.of Barcodes] is selected, then specify the number of barcodes on one label.
- If you set [Start Position] to exclude the first barcode from the check target, specify the number of barcodes without counting the excluded barcodes.
Initial value: 1
[Start Position]
[VOID Print]
Set to print / marks on the corresponding label in the event of a reading error or a comparison error.
After printing VOID, the same barcode will be issued and checked until the number of retries specified in [Retry Count] is reached.
- This function cannot be used when [Print Mode] is set to [Dispenser] or [Linerless Cutter].
- This function cannot be used when the length of the print data is less than 8 mm (0.31").
- The maximum length of the backfeed amount for VOID print is 45 mm (1.77"). However, if the length of the image printed on the label being checked is less than 45 mm (1.77"), the backfeed amount will be the length of that image.
- When this function is enabled, even if the cutter does not cut during the cutting operation, a VOID print will be forced if a comparison error occurs.
Initial value: Disabled
[Retry Count]
[Host Notification]
[Logs]
Copy or delete the log data that is automatically generated when barcode readable check or comparison check is successful or an error occurs.
This function can be used only when there is barcode check log data in the product.
When the log file reaches its maximum size (1 MB), the new log data overwrites the older log data.
- You can tap [Copy] to copy log data to a USB memory if you have connected a USB memory.
Barcode check log data is created in the following format.

The output results for each log item differ depending on whether the barcode is read or verified.
| Format ID | Description |
|---|---|
| YYYY/MM/DD | Date when read (year/month/day) |
| hh:mm:ss | Time when read (hour : minutes : seconds) |
| ZZZ | Time zone |
| TTTTTTT |
Total number of labels issued since the product was started
|
| IR |
Number of read data received after reaching the check start position
|
| SRSR | Read data size (bytes) |
| drdr... | Read data |
| RRRRRRR |
Check results
|
| IC |
Number of print data to be checked
|
| SCSC |
Print data size (bytes)
|
| dcdc... |
Print data
|