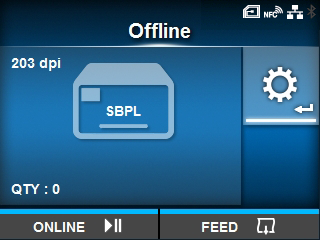
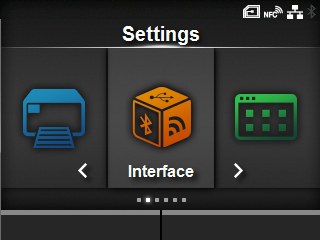
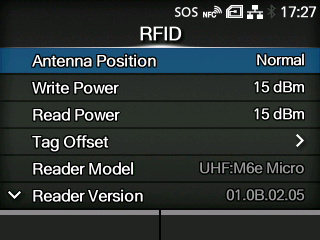
TOP > Adjusting the Product > RFID Settings (RFID Models Only) > Configuring the Product to Encode Inlays Configuring the Product to Encode Inlays This topic explains the procedures on how to configure the product to encode your inlays. 1. Examine the media to determine the product settings. Refer to the Inlay Configuration Guide for the measurements you should take and what they mean, as well as a list of inlays and their required configurations.To see the Inlay Configuration Guide, access the following URL:https://www.sato-global.com/rfid/guide.htmlTo use inlays that are not in the Inlay Configuration Guide, contact your SATO sales representative or reseller.2. Press the power button of the operator panel until the LED lights up in blue to power on the product. 3. When the product is in Online mode, press the button on the operator panel to change to Offline mode. 4. Press the button to show the [Settings] menu. 5. Press the / buttons to select [Interface] and then press the button. 6. Press the / buttons to select [RFID] and then press the button. The [RFID] screen appears.7. Press the / buttons to select the item you want to set and then press the button. The adjusting screen appears.8. Load the media and ribbon. 9. Confirm the operation by printing/encoding a media. Make sure that you read the data and check that it is correctly encoded. Back to top