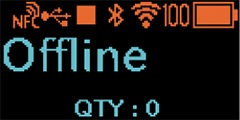
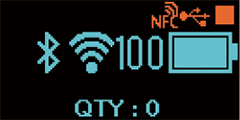
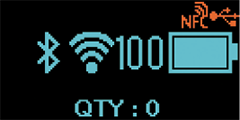
TOP > Getting Started > Powering On/Off the Product > Power On the Product Power On the Product 1. Press the button. 2. The password entry screen appears. • The password entry screen is displayed only once at the first startup when using firmware version 3.7.0 or later. • The default password is printed on the label included with the product. For models that do not include a password label, the default password is "0310". For security purposes, make sure to change the password. To set a new password, go to the [Password] > [Change Password] menu. • When you shut down the product from the password entry screen that appears the first time you turn it on after purchase, the shutdown process may take about one minute. Please be aware of this. 3. The Comm. Security Compatibility screen is displayed. Use key to enable or key to disable the setting. If this function is enabled, the settings are updated in bulk to the legacy specifications. In firmware build version 3.7.0 and later, more secure communication settings are enabled by default. Therefore, when connecting to older network devices or systems, communication may not be possible. Enabled The communication settings will be changed in bulk to the legacy specifications. While this increases compatibility, it reduces the overall security level. If you use Bluetooth, set this option to [Enabled]. Disabled * Recommended Choose the more secure settings. If communication issues occur, modify the relevant settings individually as necessary. • The Comm. Security Compatibility screen is displayed only once at the first startup when using firmware version 3.7.0 or later. If you need to change the settings after the first startup, configure each setting item individually. For the configuration items and setting values related to communication protection compatibility, please refer to the table below. Setting Item Setting value when [Disabled] is selected Setting value when [Enabled] is selected [Interface] [Network] [Settings] [Wi-Fi] [Enable] [Disabled] [Enabled] [Mode] [Infrastructure] [Ad-hoc] [Security] [WPA2] [None] [Services] [Ports] [Encryption] [Enabled] [Disabled] [LPD] [Enable] [Disabled] [Enabled] [SNMP] [Agent] [Enable] [Disabled] [Enabled] [Read-Only] [SNMP Version] [3] [1|2c|3] [Community] - [public] [Security] [Privacy] [None] [Authentication Protocol] [SHA] [MD5] [Privacy Protocol] [AES] [DES] [Read-Write] [SNMP Version] [3] [Disabled] [Community] - [private] [Security] [Privacy] [None] [Authentication Protocol] [SHA] [MD5] [Privacy Protocol] [AES] [DES] [Traps] [SNMP Version] [3] [1] [Security] [Privacy] [None] [Authentication Protocol] [SHA] [MD5] [Privacy Protocol] [AES] [DES] [Advanced] [Firewall] [Allow Services And Ports] [MAILC] [Disabled] [Enabled] [PING] [Disabled] [Enabled] [SATO All-In-One Tool] [Disabled] [Enabled] [SCP] [Disabled] [Enabled] [WEBC] [Disabled] [Enabled] [WebConfig] [Disabled] [Enabled] [USB] [Enable] [Enabled] [Enabled] [Bluetooth] [Enable] [Disabled] [Enabled] [Authentication] [Level 4] [None] [NFC] [I/F Enable] [Enabled] [Enabled] [System] [Password] [Password Enable] [Enabled] [Disabled] [Install Security] [All] [Disabled] [NFC Security] [Password] [None] [Cmn Cmd Auth] [Enabled] [Disabled] 4. [Online] is displayed (only in normal display). Normal view Enlarged icon view When [Disabled] is selected in [Start Online], [Offline] (only in normal display) and the icon are displayed. Press the button to switch to the print (online) screen. Normal view Enlarged icon view Related Topics [Start Online] Back to top



 button.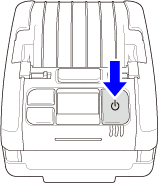

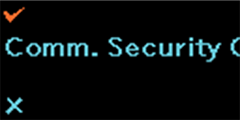
 key to enable or
  key to disable the setting.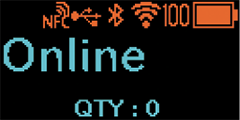
 icon are displayed. Press the