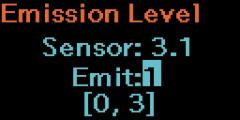
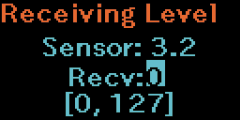
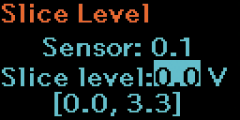
TOP > Various Settings of the Product > Product’s [Settings] Menu > [Printing] Menu > [Advanced] > [Calibrate] > I-mark Sensor I-mark Sensor Adjust the I-Mark sensor level manually. 1. Remove the label, and then set the liner. Align the liner so that the media sensor does not detect the I-Mark (black mark). 2. Close the cover. 3. Select [Calibrate] > [I-Mark Sensor] > [Emission Level]. 4. Press the button to change the Emit value so that the Sensor value is adjusted to 0.5 or lower. 5. Press the button to decide the value. 6. Select [Calibrate] > [I-Mark Sensor] > [Receiving Level]. 7. Press the button to change the Recv value so that the Sensor value is adjusted to meet the following: ◦ Sensor High value - Sensor Low value ≥ 1.0 V ◦ Sensor High value: I-Mark part ◦ Sensor Low value: Liner part Adjust the values so that the Sensor value in the Liner part is approximately 0.3 V to 0.5 V. Then, pull the media to check that the I-Mark part value - the Label + Liner parts value ≥ 1.0 V. 8. Press the button to decide the value. 9. Select [Calibrate] > [I-Mark Sensor] > [Slice Level]. 10. Press the button to change the slice level. Adjust the slice level so that it becomes the level calculated the following: (High value - Low value) x 0.7 + Low value = Slice Level 11. Press the button to decide the slice level. Back to top