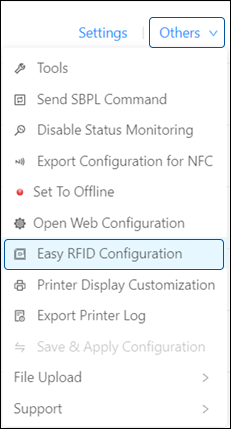
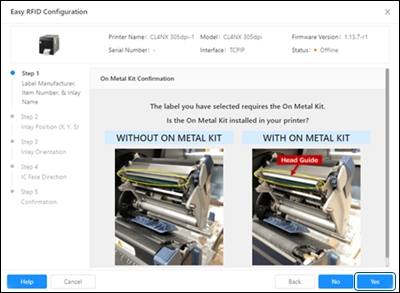
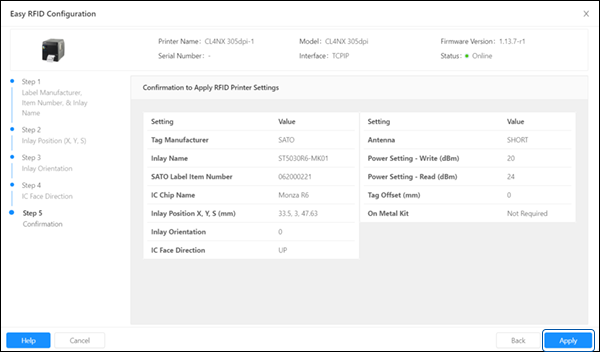
The [Easy RFID Configuration] function allows users to improve effectiveness and accuracy for UHF RFID configuration to the printer. Users can configure RFID printer settings only for supported printers with RFID enabled and equipped with the UHF RFID module.
1.
On the printer page, click [Others] > [Easy RFID Configuration] of the selected printer.
The [Disclaimer Message] dialog is shown.
2.
Read the [Disclaimer Message] carefully. If you agree with the terms, click [OK] to proceed.
The [Easy RFID Configuration] dialog is shown.
3.
Click the respective drop-down list to set the [Tag Manufacturer], [SATO Label Item Number], or [Inlay Name] options.
Click [Clear All] to clear all selection.
Click [Help] to access our SATO support link if you have difficulties finding the label or need the On Metal Kit for the printer.
Click [Cancel] to end the configuration.
4.
Click [Next] to proceed, or skip to specific steps by selecting the desired step from the list on the left (b).
If you selected the label that requires the On Metal kit. The [On Metal Kit Confirmation] dialog will be shown.
Click [Yes] if the On Metal Kit is installed.
Click [No] if the On Metal Kit is not installed. You need to install this kit to the printer in order to use the selected label. Click our SATO support link on the [Help] dialog for further inquiry on the On Metal Kit.
6.
Click [Next].
8.
Click [Next].
10.
Click [Next].
11.
12.
Read the message in the [Confirmation] or [Notifications] dialog, and click [Yes] to proceed or act in accordance with the recommended course of action.
If you click [Yes], an SBPL Command will be sent over to the printer to apply the setting.
13.
After successful applied the RFID printer settings, click [Close] to end the [Easy RFID Configuration] or click [Start Over] to make another configuration.
For CL4NX Plus, CL6NX Plus, CL4NX-J Plus, CL6NX-J Plus, CT4-LX and S84NX, click [Reboot Printer] button so that the printer can automatically adjust the position of the antenna to suit the RFID tag.
The [Easy RFID Configuration] dialog will be closed and user will be directed to the printer page.
 

Top

Back