The [Add Graphics] dialog is shown.
|
2.
|
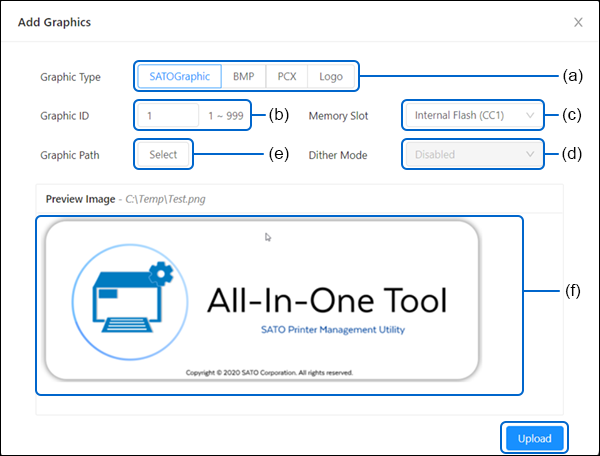
Select the [Graphic Type] (a) for the graphic that you want to upload.
|
|
|
|
•
|
Before uploading [SATOGraphic], [BMP] or [PCX] files, make sure the printer's [Protocol] is set to [Auto] or [SBPL].
|
|
•
|
The [Logo] option is not supported on WT4-AXB series (International Model) printers.
|
|
|
4.
|
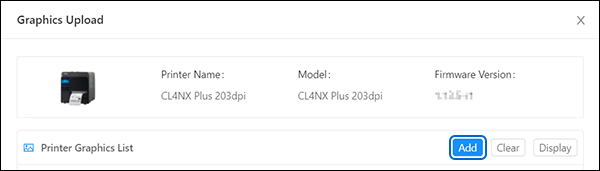
Click the [Memory Slot] drop-down list (c) and select the memory location that you want to save the graphic.
|
[Memory Slot] is not available if
[Logo] is selected in
[Graphic Type].
|
5.
|
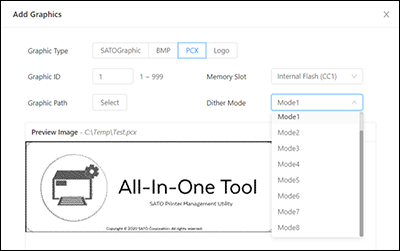
Click the [Dither Mode] drop-down list (d) and select the dithering effect.
|
The Dithering effect feature is only applicable if you have selected [BMP],
[PCX] or
[Logo] in
[Graphic Type]. It allows the uploading of graphics with color fading effects.
|
6.
|
Click the [Graphic Path] selection box (e) to select the graphic file from the PC file system.
|
|
|
|
•
|
When the [Dither Mode] is set, the [Preview Image] box shows the output of the dithering effect.
|
|
- Related Topics
-
-