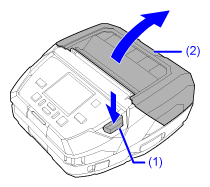
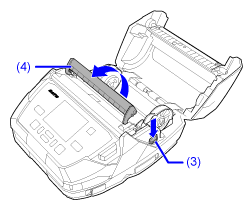
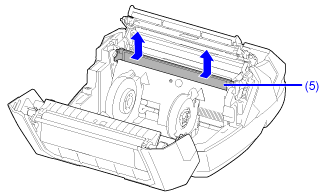
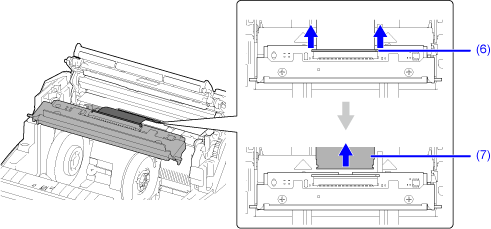
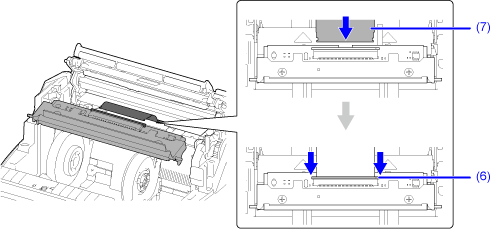
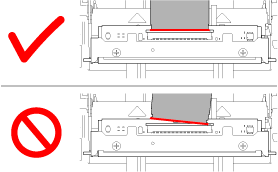
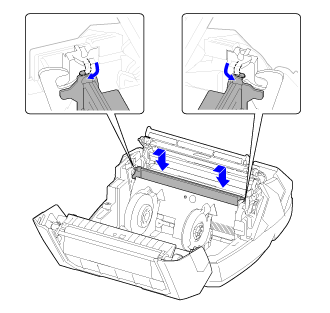
TOP > Maintenance > Replacing Consumable Parts > Replacing the Print Head Replacing the Print Head View the video here (it has no audio). You can easily remove and replace a damaged or worn print head. • Do not power on or off the product, or connect or disconnect the power cord while your hands are wet. Doing so could cause an electric shock. • Disconnect the power supplies, such as the power cord and the battery before you begin replacing the print head. • Wear gloves before replacing the print head, to prevent damage to the print head. View the video below for the procedure. 1. Make sure that the product is powered off, and then remove the battery. 2. Press the cover open button (1) to open the top cover (2). 3. Press the dispenser roller release button (3), and pull out the dispenser unit (4). 4. Remove the media if it is already loaded. 5. Take out the print head (5). • The print head and its surroundings are hot after printing. Wait until the product cools down.• Touching the edge of the print head with your bare hand could cause injury.• Do not touch the heating unit and terminals of the print head.a. Press in the print head (5) while pulling it out upward. b. Raise both ends of the connector (6), and remove the flat cable (7). 6. Insert the flat cable (7) into the connector (6) of the new print head, and press the connector in, in the direction of the arrows. Insert the flat cable perpendicularly into the connector until the white line on the flat cable. • Handle the print head and flat cable with care. Do not contaminate or scratch the sensitive print head surface.7. Insert the print head, install it to fix the grooves on both ends as you press it inward. 8. Reload the media if you removed it in step 4. 9. Close the top cover. Push both ends of the top cover, and close it firmly until it clicks. • When closing the top cover, be careful not to pinch your fingers.Related TopicsLoading Media Back to top