Configuring Multiple Printers Using the AEP Utility 3 Application
This procedure is useful when configuring multiple printers to connect to the Loftware Cloud without manually entering the required data.
Pre-requisites:
Install the AEP Utility 3 application on your PC. You can download the latest AEP Utility 3 application from the link below.
https://www.sato-global.com/files/Document/AEP/AEP_Utility_3_Setup.zip?channel=main
Open the downloaded [Loftware Connector for SATO] package file (.pkg) using the AEP Utility 3 application on your PC.
Click the [Settings] table.
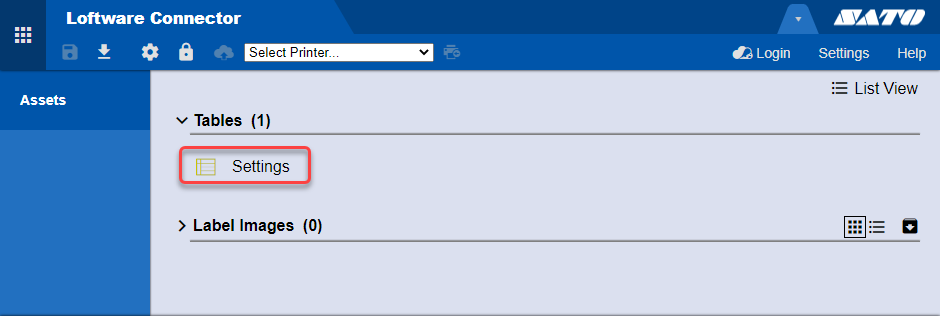
The application opens the [Settings] table and displays it on the screen.
In the table, enter the [SerialNumber], [Account], [Password], and [Comment] for each printer that you want to connect.
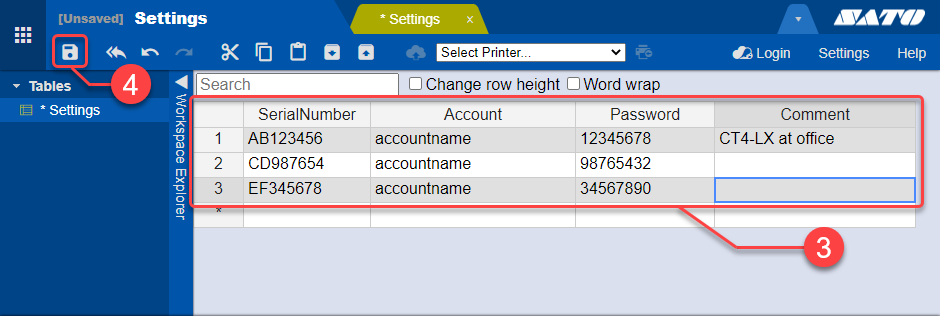
[SerialNumber]: Enter the serial number of the printer.
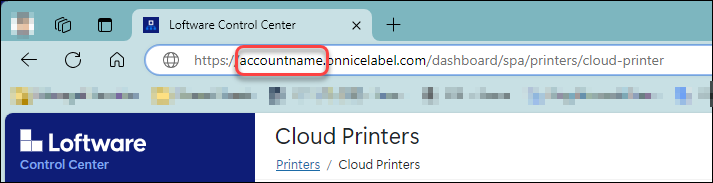
[Account]: Enter your Loftware Cloud account name.
You can refer to your Loftware Cloud account name from the Loftware Control Center URL after logging in.
[Password]: Enter the [One-time connection key] you copied when registering your printer on the Loftware Control Center.
You can refer to the [One-time connection key] by clicking the printer name in the [Loftware Control Center] > [Printers] > [Cloud Printers] list. The information for the selected printer will be displayed.
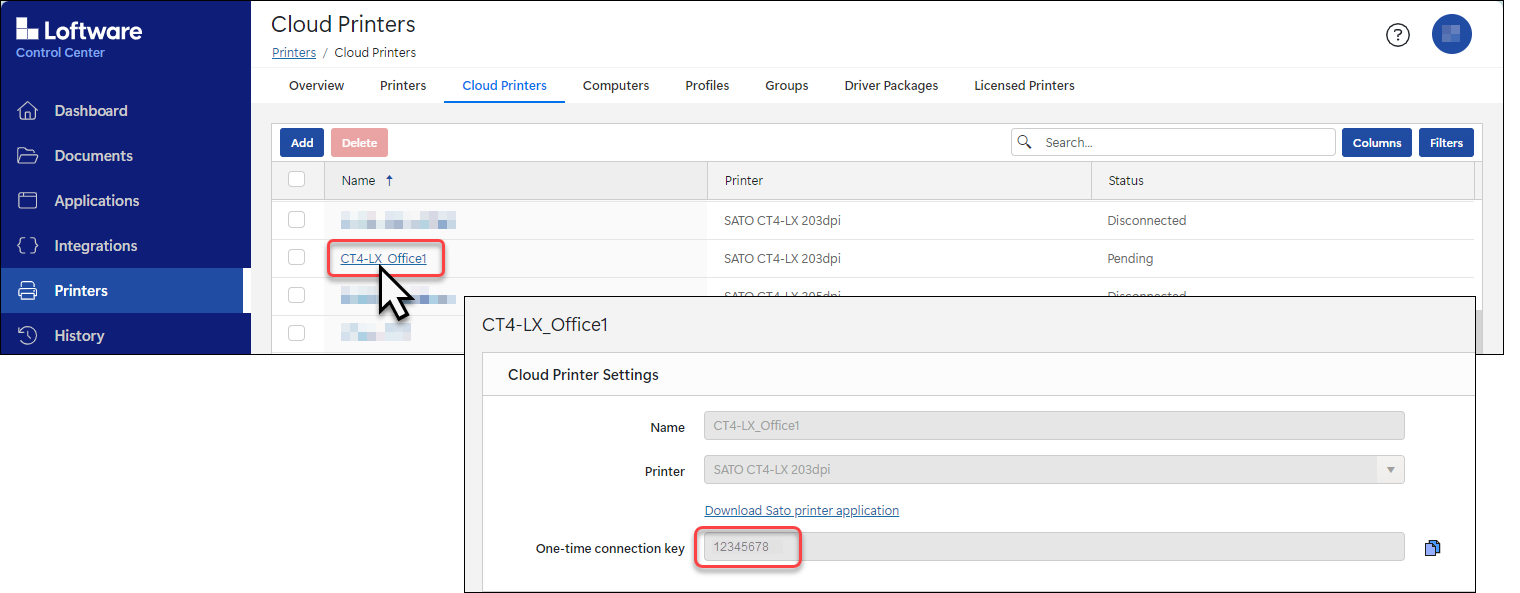
- Note that the [One-time connection key] is only visible when the printer is in [Pending] status. If the printer is in [Connected] or [Disconnected] status, the [One-time connection key] will not be displayed.
[Comment]: Enter any information for your reference. This is optional.
Click ![]() to save the package file (.pkg).
to save the package file (.pkg).
Install the edited [Loftware Connector for SATO] package file on each registered printer to connect them to the Loftware Cloud.
There are a few options for installing the package file. Please refer to Installing the Package File.