CL4NX/CL6NX Operator Manual
SATO

MENU

How to Search

MENU

  • TOP (Table of Contents)
  • Getting Started
  • Searching from Category
  • Searching by Function Names
  • Searching According to What You Want to Do
  • Troubleshooting
  • Support and Warranty
Close
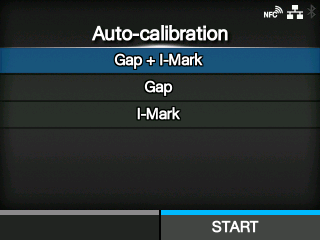
TOP > Various Settings of the Product > The Product's [Settings] Menu > [Printing] Menu > [Advanced] > [Calibrate] > [Auto-calibration]
[Auto-calibration]
Perform the auto-calibration for the selected media sensor.
[Auto-calibration] is not available if you have installed the optional linerless cutter kit (CL4NX only).
Gap + I-Mark
Adjusts both the Gap sensor and I-mark sensor.
Gap
Adjusts the Gap sensor.
I-Mark
Adjusts the I-mark sensor.
The procedure to auto-calibrate the media sensor is as follows:
1.
Push the head lock lever towards the rear to unlock the print head.
2.
Pass the media below the media sensor guide. If you are using labels, remove the label from the liner. Align it so that the media sensor does not detect the I-mark (black mark).
3.
Press the print head down until the head lock lever is locked. To get the correct adjustment result, adjust after you have locked the print head.
4.
Press the / buttons to select the type of sensor to be adjusted.
5.
Press the button or button.
6.
When the confirmation screen appears, press the button to start the sensor adjustment.
7.
The result of the sensor adjustment is shown. To exit the adjustment, press the button.
8.
Set to Offline mode. Press the button to confirm that the media is fed correctly.
 
•
If the media is not fed correctly after doing [Auto-calibration], contact your SATO reseller or technical support.

Back to top

© 2023 SATO Corporation. All rights reserved.