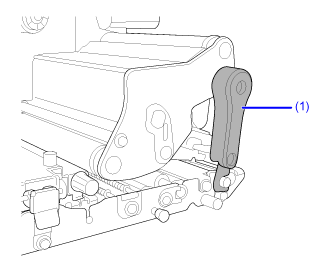
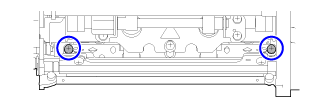
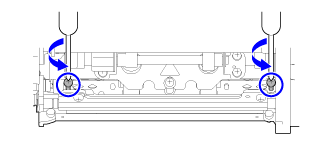
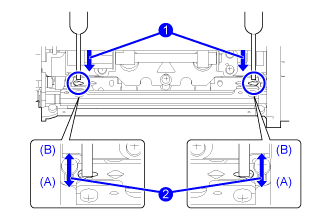
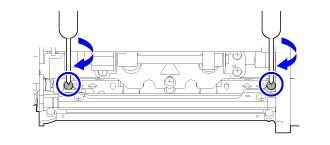
TOP > Adjusting the Product > Adjusting the Head Position > Front - Rear Head Alignment Front - Rear Head Alignment Required tools• Phillips screwdriver• Slotted screwdriverThe adjustment procedure for the head alignment is as follows: 1. Open the top cover of the product. 2. Make sure that the head lock lever (1) is in the lock position. If it is not locked, turn the head lock lever counterclockwise to lock the print head.3. Find the two screws on the front of the print head assembly. 4. Loosen the two screws using the Phillips screwdriver. Do not remove the screws.5. Insert the slotted screwdriver into the regulation apertures on the left and right sides. Adjust the head position by turning the slotted screwdriver in the relevant direction . Direction (A): Print head position moves forward.Direction (B): Print head position moves backward.6. Tighten the two screws. Back to top