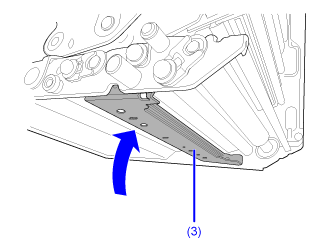
TOP > Maintenance > Replacing Consumable Parts > Replacing the Pressure Plate Replacing the Pressure Plate View the video here (it has no audio). • For Standard (American | Right Hand) / International | Left Hand Type • For Opposite (American | Left Hand) / International | Right Hand Type You can easily remove and replace a damaged or worn pressure plate. • Do not power on or off the product, or connect or disconnect the power cord while your hands are wet. Doing so could cause an electric shock. • Disconnect the power cord from the AC outlet before you replace the pressure plate. View the video below for the procedure.Standard (American | Right Hand) / International | Left Hand Type Opposite (American | Left Hand) / International | Right Hand Type 1. Make sure that the product is powered off, and disconnect the power cord from the AC outlet. 2. Open the top cover. • Open the top cover fully to prevent accidental drop of the cover.3. Turn the head lock lever (1) clockwise to unlock the print head. • The print head and its surroundings are hot after printing. Be careful not to get burned.• Touching the edge of the print head with your bare hand could cause injury.4. Push the tab (2) up to release the pressure plate (3). 5. While supporting the pressure plate (3), loosen screw (4) until the front of the plate falls , and then pull the pressure plate (3) forward to remove it . Then, replace it with a new pressure plate. 6. Insert the protrusion of the product's center frame securely into the mounting hole on the leading-edge side of the pressure plate (3). 7. Align the position of the screw (4) to the mounting hole on the front side of the pressure plate (3) , and tighten them . 8. Push the center of the pressure plate (3) to latch it in place. Related TopicsLoading Media with Dispenser Back to top