Configuring a Single Printer Manually
Pre-requisites:
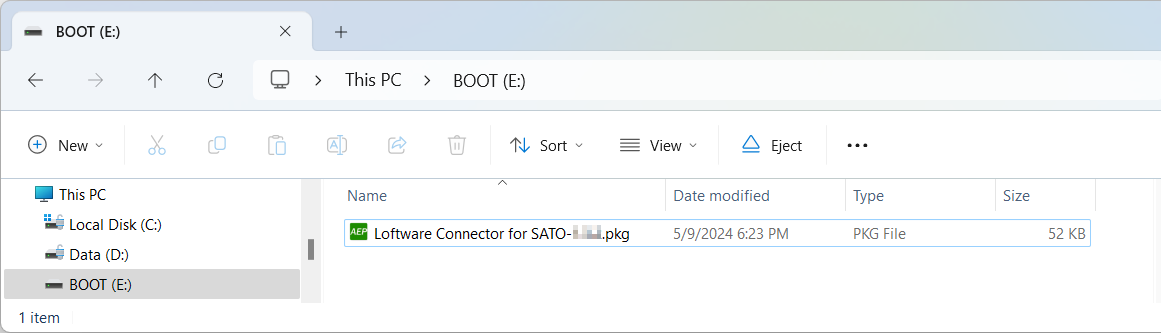
Save the downloaded [Loftware Connector for SATO] package file to the root directory of the USB memory.
- Be sure to perform a virus check on the USB memory before connecting it to the printer. SATO Corporation shall not be held responsible for any product malfunctions caused by a virus spread via USB memory.
- The printer does not support USB memory with security functions such as fingerprint authentication.
- The printer does not support connection through the USB HUB.
- Use USB memories that are formatted to FAT32.
Follow the procedures below to configure your printer to connect to the Loftware Cloud.
* This manual uses screenshots of the CT4-LX series printer for its descriptions. The appearance of the screens may vary when using other SATO printers.
Insert the USB memory into the printer's USB connector (Type A).
Please refer to the individual printer's operator manual for more details on connecting the USB memory.
The link to the printer's operator manual is on the Supported Printers page.
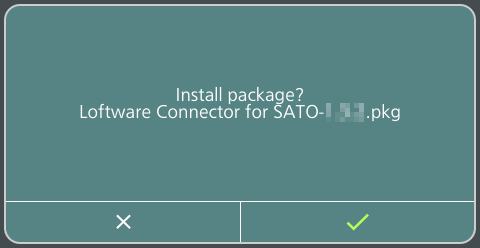
Once the printer detects the package file, it will show a confirmation message.
Confirm the package file and select ![]() to proceed with installation.
to proceed with installation.
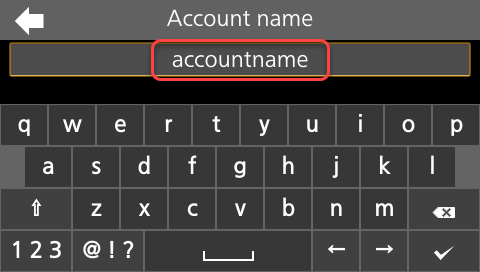
After installation, the printer automatically restarts and displays the [Account name] input screen.
Enter your Loftware Cloud account name.
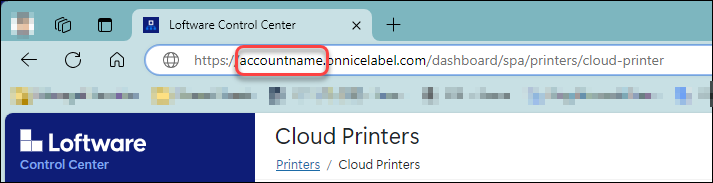
You can refer to your Loftware Cloud account name from the Loftware Control Center URL after logging in.
Select ![]() to confirm the input.
to confirm the input.
In the [Password] box, enter the [One-time connection key].
Please use the [One-time connection key] you copied when registering your printer on the Loftware Control Center.
For more information, refer to Registering Cloud Printer on the Loftware Control Center.
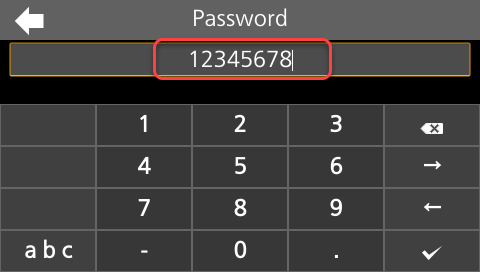
You can refer to the [One-time connection key] by clicking the printer name in the [Loftware Control Center] > [Printers] > [Cloud Printers] list. The information for the selected printer will be displayed.
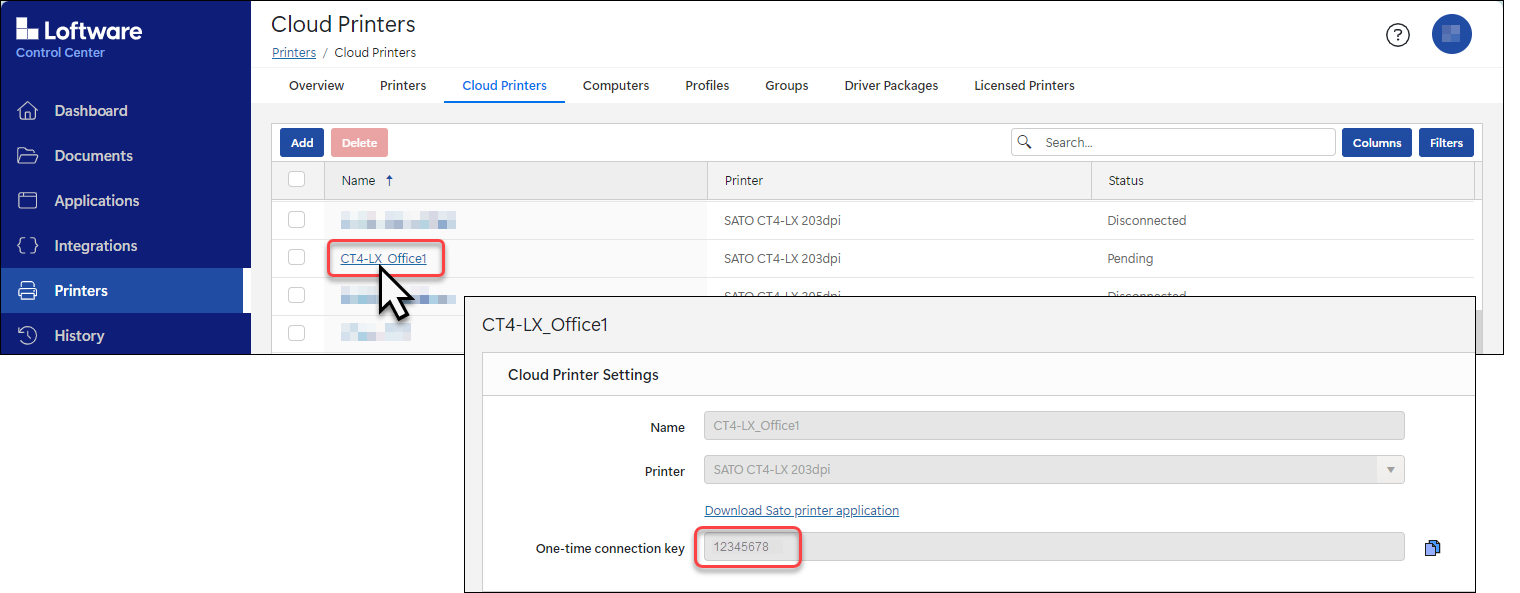
- Note that the [One-time connection key] is only visible when the printer is in [Pending] status. If the printer is in [Connected] or [Disconnected] status, the [One-time connection key] will not be displayed.
Select ![]() to confirm the input.
to confirm the input.
The printer completes the connection process and displays the [AVAILABLE] screen.
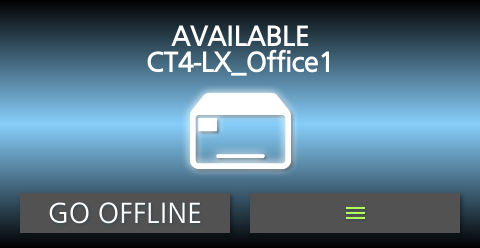
Your printer is configured and connected to Loftware Cloud.
The Control Center lists your printer in the Cloud printers section with the status [Connected]. Your SATO printer is connected and ready to use.
Remove the USB memory from the printer.