Installing the Package File via AEP Utility 3 Application
After adding printers' data to the [Settings] table in the [Loftware Connector for SATO] package file, you can continue installing the package file to each printer using the AEP Utility 3 application.
* This manual uses screenshots of the CT4-LX series printer for its descriptions. The appearance of the screens may vary when using other SATO printers.
Open the edited [Loftware Connector for SATO] package file (.pkg) with the AEP Utility 3 application on your PC.
Select the target printer from the [Select Printer] drop-down list.

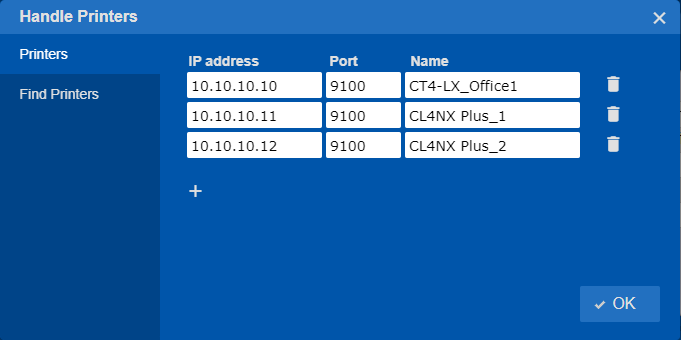
You must add printers to the AEP Utility 3 to display the printers on the drop-down list.
Select [Handle printers] to add the desired printers to the AEP Utility 3. The added printer will appear in the drop-down list.
Click ![]() to send the package file to the selected printer.
to send the package file to the selected printer.
The package file is installed on the printer automatically.
If the serial number matches, the printer completes the connection process and displays the [AVAILABLE] screen.
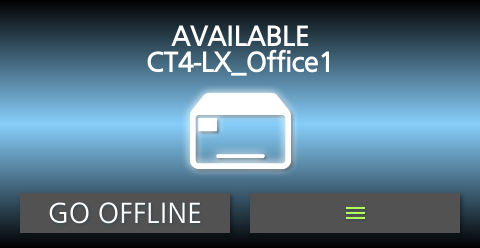
Your printer is configured and connected to Loftware Cloud.
The Control Center lists your printer in the Cloud printers section with the status [Connected]. Your SATO printer is connected and ready to use.
Repeat steps 2 and 3 to send the package file to the next registered printer and connect it to the Loftware Cloud.