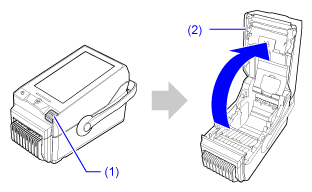
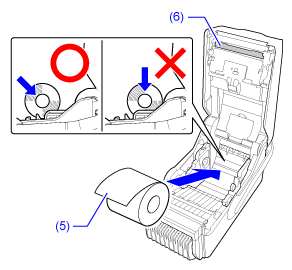
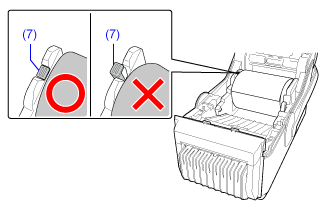
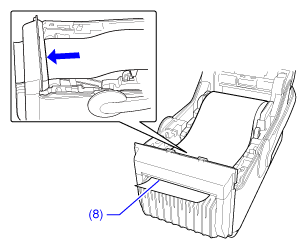
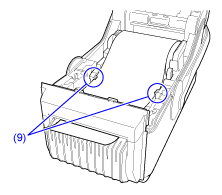
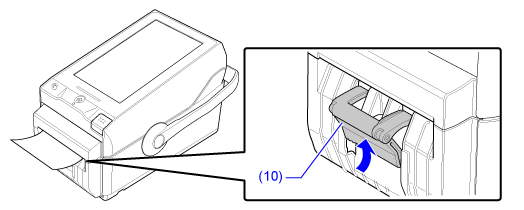
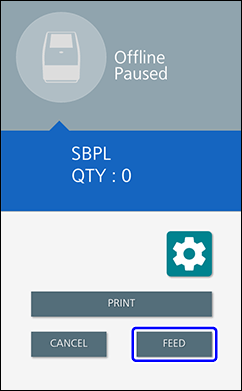
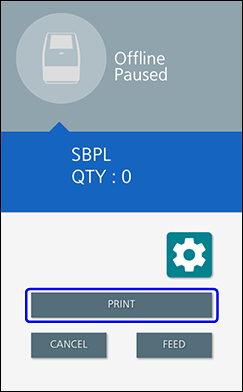
TOP > Loading Media > Loading the Media > Loading the Media Roll > Loading the Media Roll (Printing in Linerless Cutter Mode) Loading the Media Roll (Printing in Linerless Cutter Mode) View the video here (it has no audio). • The print head and its surroundings are hot after printing. Be careful not to get burned. • Touching the edge of the print head with your bare hand could cause injury. • Be careful not to touch the cutter blade. • When printing in linerless cutter mode, install the optional linerless kit and cutter kit or linerless cutter kit. Also, specify the cutter type of the linerless cutter kit or the cutter kit in the [Printing] > [Cutter Type] menu. View the video below for the procedure. 1. Press the cover open button (1) to open the top cover (2). 2. While pushing the slide lever (3), move the media guide (4) which is on the right side to adjust its width to match the width of the media roll. • Do not load the media roll yet.• Change the flap position of the media guide in accordance with the core diameter of the media roll.3. Load the media roll. Set the media roll with the print side (5) facing the print head (6) and push it diagonally from the front.If the media roll is loaded correctly, the indicator part (7) of the media guide that moved to side returns to its original position.4. Insert the media from the inside of the product into the media discharge outlet (8) and pass it through to the outside. 5. Pass the media below the tabs (9). 6. Close the top cover. Push both ends of the top cover, and close it firmly until it clicks. • When closing the top cover, be careful not to pinch your fingers.7. When you use the linerless label and the protective cover is not attached, raise up the label stand (10) of the cutter kit until it clicks. 8. Tap [FEED]. The media is fed to the print start position.9. Tap [PRINT] to change to Online mode. Related TopicsChanging the Flap Position of the Media Guide[Cutter Type] Back to top