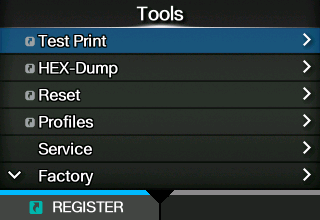
1.
2. Press the button to start the test print. Press the button again to pause the print.
•
• The value of [Pitch], [Offset] and [Darkness Adjust] set in the [Factory] menu will be reflected to the same item settings in the [Configure List] menu, [Configure QR] menu, [Paper Sensor] menu and [Head Check] menu.
• The settings in [Pitch], [Offset], and [Darkness Adjust] are linked and are changed with the settings in the [Printing] > [Advanced] > [Adjustments] menu.
1.
2. Press the button to start the test print. Press the button again to pause the print.
•
•
• The settings in [Pitch], [Offset], and [Darkness Adjust] are linked and are changed with the settings in the [Printing] > [Advanced] > [Adjustments] menu.
1.
2. Press the button to start the test print. Press the button again to pause the print.
•
•
• The settings in [Pitch], [Offset], and [Darkness Adjust] are linked and are changed with the settings in the [Printing] > [Advanced] > [Adjustments] menu.
1.
2. Press the button to start the test print. Press the button again to pause the print.
•
•
• The settings in [Pitch], [Offset], and [Darkness Adjust] are linked and are changed with the settings in the [Printing] > [Advanced] > [Adjustments] menu.
1.
2. Press the button to start the head check print. Press the button again to pause the print.
•
•
• The settings in [Pitch], [Offset], and [Darkness Adjust] are linked and are changed with the settings in the [Printing] > [Advanced] > [Adjustments] menu.If you set [Hex Dump Mode] to [Enabled], the product prints the received data and at the same time creates a file of the received data inside "hexdump/".
•
•
•
•
1.
◦
◦
2. Select the file to copy and press the button. A check mark appears on the right side of the file name.
3. After you select the file, press the 
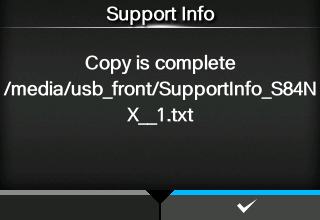
button to copy the selected file to the USB memory.
•
1.
◦
◦
2. Select the file to delete and press the button. A check mark appears on the right side of the file name.
3. After you select the file, press the button to delete the selected file.
•Press the button to cancel or button to perform the initialization.
Initialize the items that are not included in the [Interface] menu to the status after factory shipment.Select the item to be initialized using the / buttons and then press the button to show the confirmation screen.Press the button to cancel or button to perform the initialization.
1. Select the profile to be deleted using the / buttons.
2. Press the button or press the button to confirm.
1. Select the profile to be loaded using the / buttons.
2. Press the button or press the button to confirm.A check mark appears on the right side of the loaded profile name. And the name of the loaded profile appears on the [Profiles] menu in the parentheses.To save the current product settings as a new profile, press the button and enter the name of the profile.Press the button to confirm.
2. Press the button or the button to confirm.
3.
• You cannot use this function with the S84NX RFID models.Set a label with barcodes within the scanning range of the barcode checker, and then press the button to start reading.
• A [RS-232C Reader] will be available in the future for expanded functions. If you are using a scanner manufactured by DATALOGIC, then you do not need to change this setting from [RS-232C] (initial value).To include barcodes that are not created by barcode commands (such as graphic data or preprinted barcodes) as the target of the barcode readability check, select [Settings] in [Set No. of Barcodes], and specify the number of barcodes per label in [Barcodes per Label].Appears only if you have selected [Readable] in the [Mode] menu. Available only if you have selected [Setting] in the [Set No. of Barcodes] menu.
• When excluding first barcode(s) from the check target by setting [Start Position], specify the number of barcodes without the excluded barcodes.
•After VOID printing, the product prints and checks the same label until it reaches the number of retries specified in [Retry Count]. If the error still occurs after the specified number of retries are done, the product pauses after VOID printing, and shows an error message on the display.
•
Press the button to copy the log data to the USB memory.Press the button to delete the log data.
By selecting [Support Info] and pressing the button, the support information is saved to the USB memory.Press the button to complete.
• The logging function does not operate when powering off is done by using the power (I/O) switch. Pressing and holding the four arrow (/ //) buttons at the same time for about 3 seconds saves log data and turns off the power.
• When powering off the product with the four arrow (/ //) buttons to use the logging function, use the same buttons to power on the product again.Press the button to delete the log data.