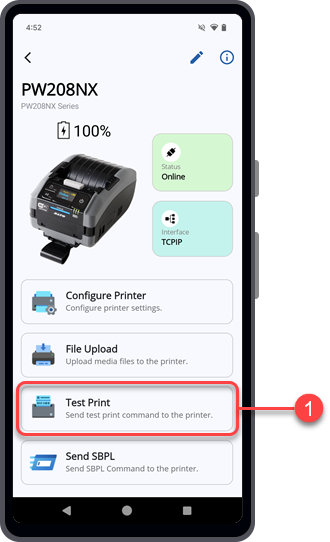
The [Test Print] screen is shown.
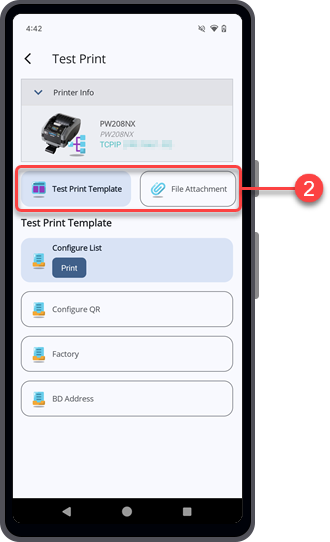
2. | On the [Test Print] screen, select the page source for printing. You can either choose to print using the [Test Print Template] or the [File Attachment]. |
1. | On the [Test Print] screen, tap the [Test Print Template] button. |
[BD Address] is only available for some printers.
3. | Tap the [Print] button of the selected test print template. |
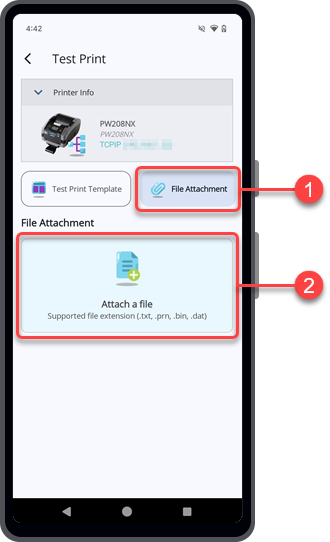
1. | On the [Test Print] screen, tap the [File Attachment] button. |
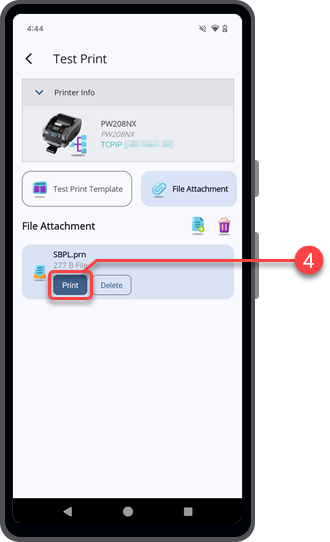
4. | Tap the [Print] button of the selected test print file. |
| • | Tap  to add more files. |
• | Tap the [Delete] button of the selected file to delete it. |
• | Tap  to delete all the attached files. |
• | When the [File Attachment] list has more than one file, you need to first select the test print file and then tap the [Print] button or the [Delete] button. |
|
- Related Topics