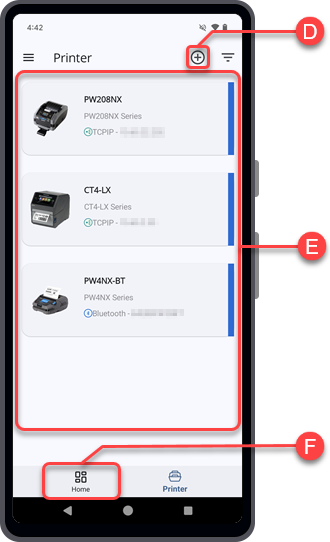
TOP > Getting Started > Navigating the Application > Printer Page Overview Printer Page Overview The [Printer] page provides a simple way to add and manage your SATO printers. From this page, you can add printers connected through TCP/IP (LAN or Wi-Fi) or Bluetooth. After a printer’s connection information is saved, you can reconnect to it easily without re-entering the details. Add printer iconTap to add a new printer. The [Add Printer] screen is displayed.You can add SATO printers connected through TCP/IP (LAN or Wi-Fi), or Bluetooth. Please note that only printers supported by the Mobile All-In-One Tool can be added.For more details on the operation, refer to Adding Printers to the Printer List. Printer listThis section shows all printers added to the application. If the list is long, swipe up to view more printers.Each printer entry displays:• Printer name• Printer model series• Serial number• Interface type (TCP/IP or Bluetooth)Tap a printer entry to open its dashboard.The application will attempt to connect and retrieve the selected printer's data using the saved interface settings. If the connection is successful, you can perform remote operations on the printer. If the printer supports the login feature, you must sign in before performing any operations.For more information, refer to Dashboard Overview. Swipe left on a printer entry to access more options: • 
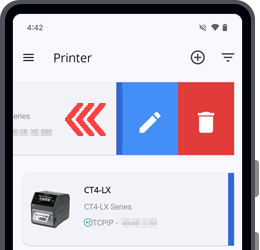
[Edit] — Edit the printer name, IP address, port number, or Bluetooth address.• [Delete] — Remove the printer from the list. [Home] iconTap [Home] to return to the [Home] page. Related TopicsHome Page OverviewDashboard Overview